Client Introduction
Clash for Windows
This desktop client manages Clash profiles through a graphical interface, including subscription import, policy-group switching, system proxy control, and profile updates.
Add configuration files
Profiles can be added in two ways: import a remote subscription URL, or drag/import a local configuration file. Both are usually provided by your node service.
- Remote subscription URL
- Local configuration file
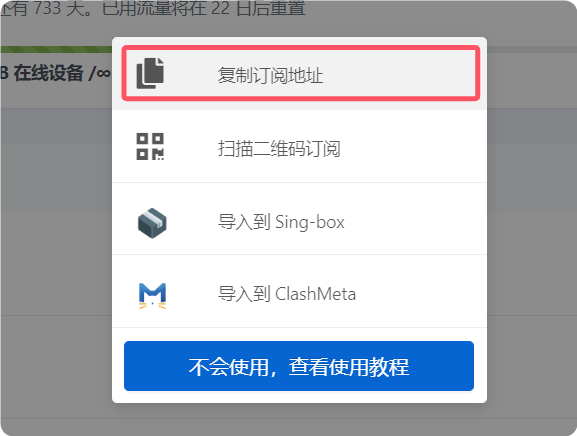
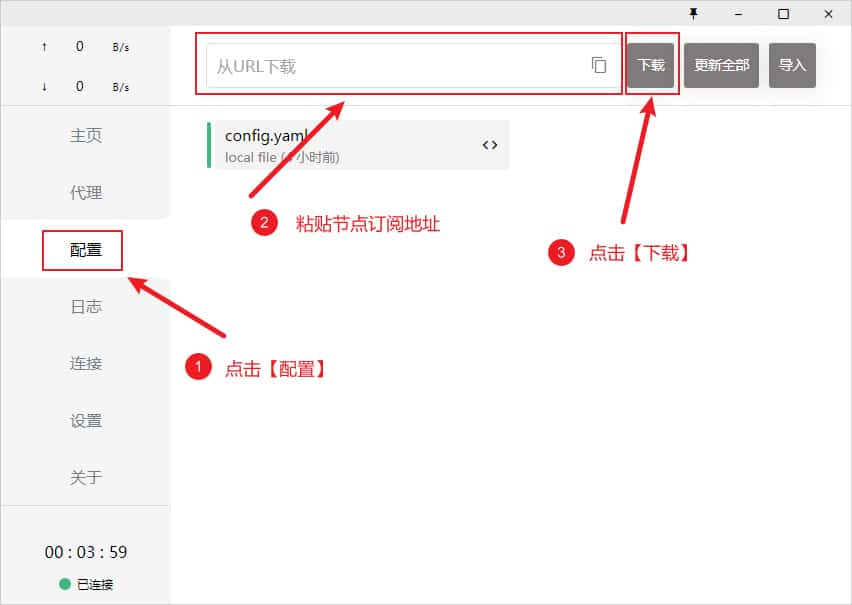
Import a remote subscription URL
Copy the Clash subscription URL from your provider. In Clash for Windows, open Profiles from the left menu, paste the URL into the top field, and click Download. When it finishes, click the downloaded profile to activate it.
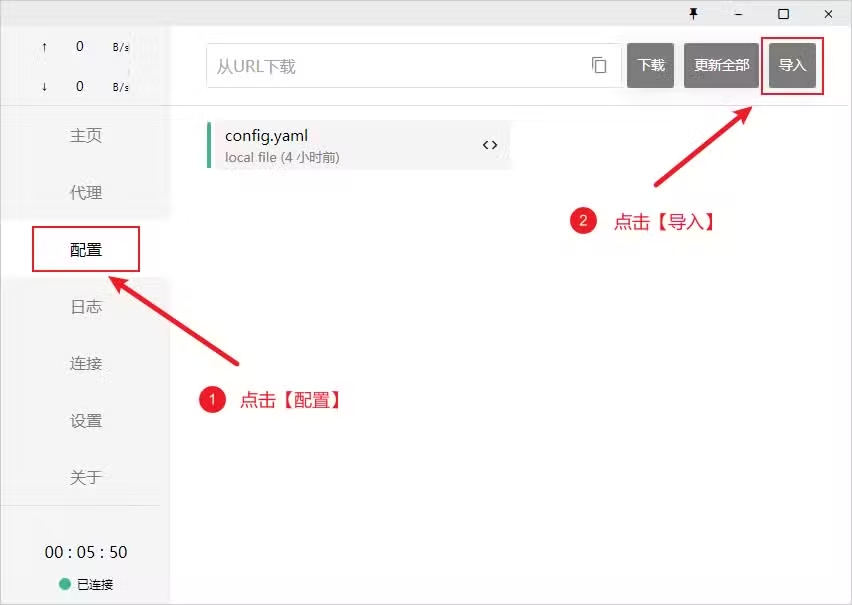
Import a local configuration file
If URL import is unavailable, download the configuration file in your browser, then drag it into the client window or use Import to add it manually.
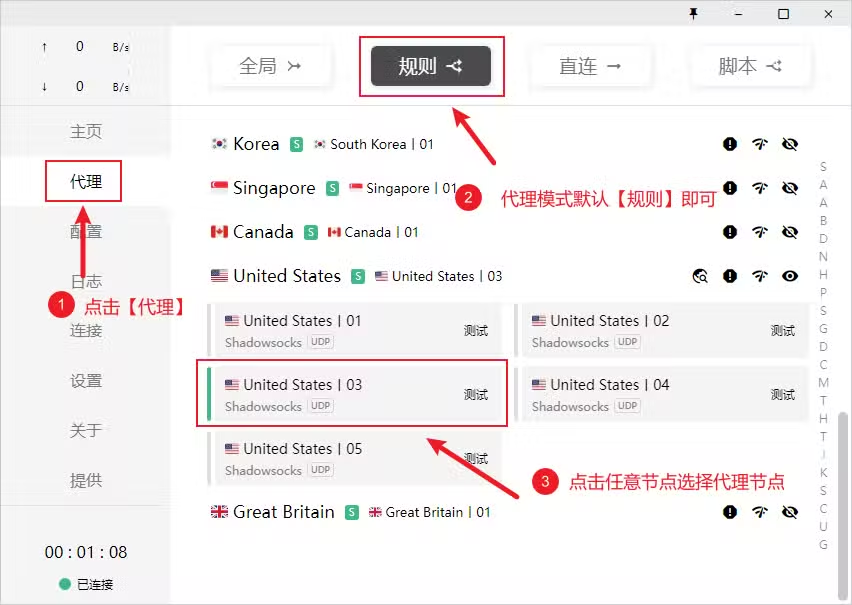
Select a proxy node
After importing the subscription, open Proxies from the left menu. Keep the mode set to Rule by default, then click a node inside the expanded proxy group. The reference lists four modes: Rule, Global, Direct, and Script.
- Rule: route requests according to profile rules.
- Global: send all requests through the proxy server.
- Direct: send all requests directly to their destinations.
- Script: route requests according to script rules.
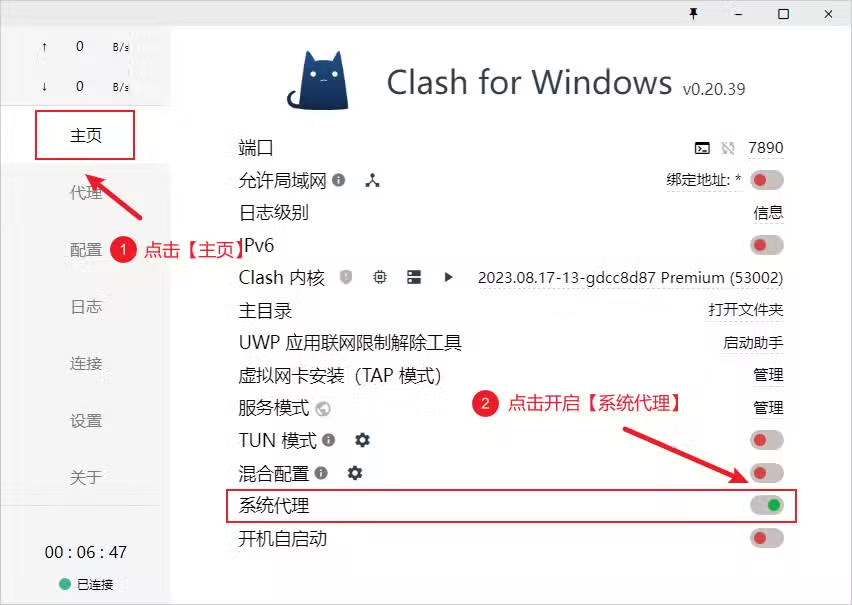
Enable proxy
Open Home from the left menu and turn on System Proxy. The switch turns green when enabled, system traffic is routed through the active profile, and the tray icon color changes as shown in the reference.

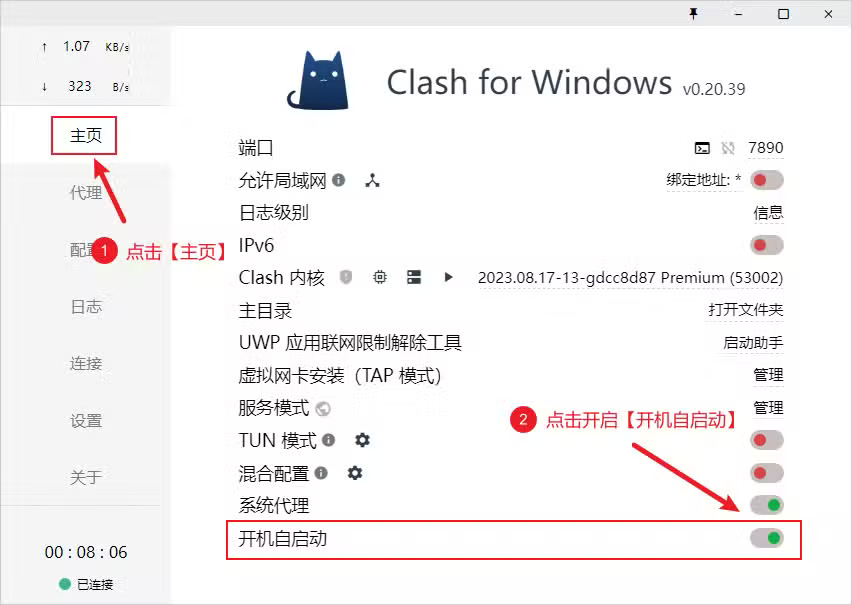
Launch at startup
In Home, turn on Launch at Startup. When the switch is green, the client will start with the system.
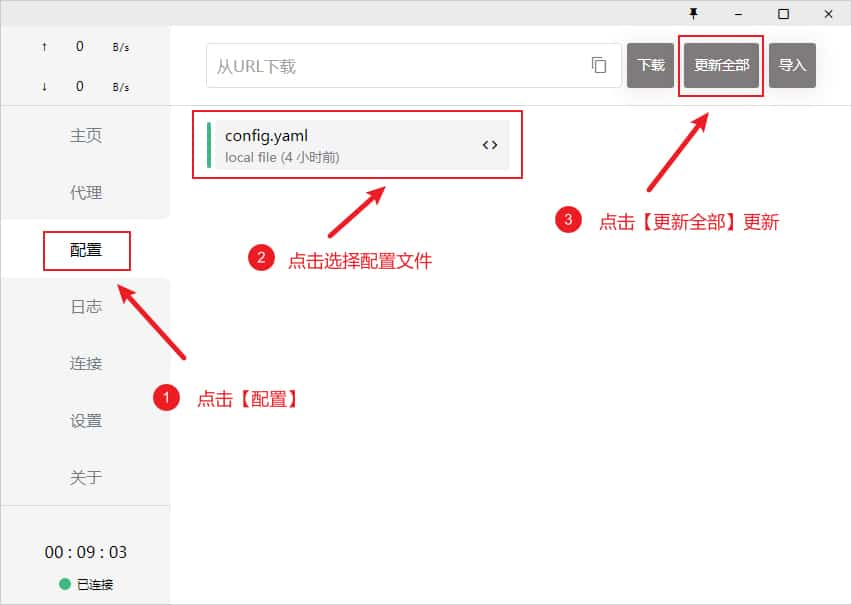
Update profiles
Open Profiles and click Update All to refresh every profile. Use this when your subscription nodes have changed.