
Client Introduction
ClashX Meta
ClashX Meta serves macOS users with hosted profile management, node lists, and system proxy control, especially for Meta-core configurations.
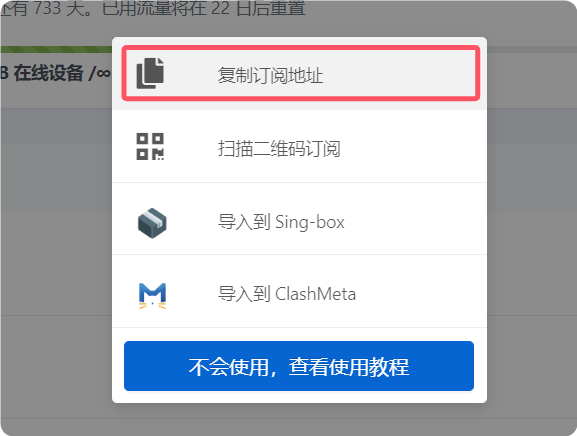
Get subscription
Copy the subscription URL from your provider.
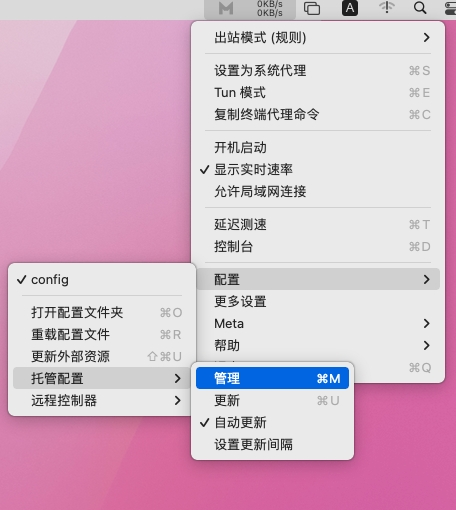
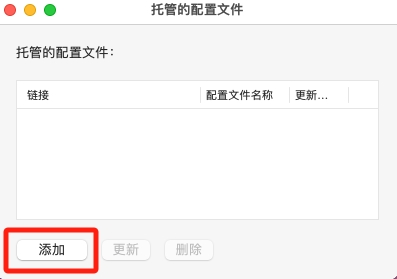
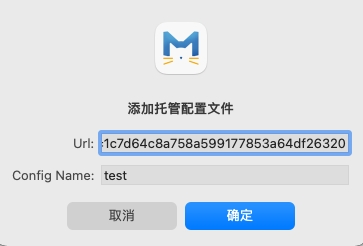
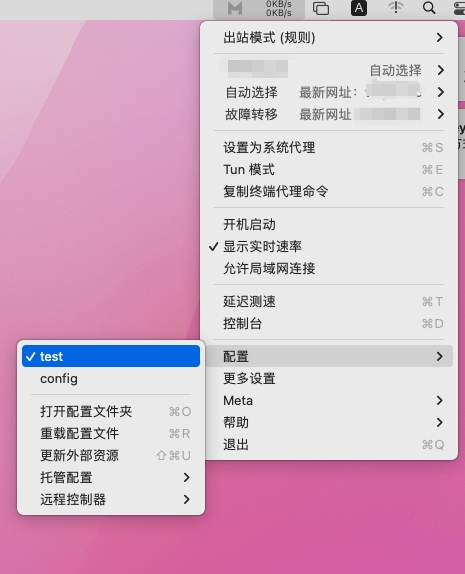
Add subscription
Click the ClashX Meta icon and choose Config > Remote Config > Manage. In the hosted profile window, click Add, paste the subscription URL into the URL field, enter a name in Config Name, and confirm.
Select profile
Click the menu-bar icon and select the newly added profile from the config menu.
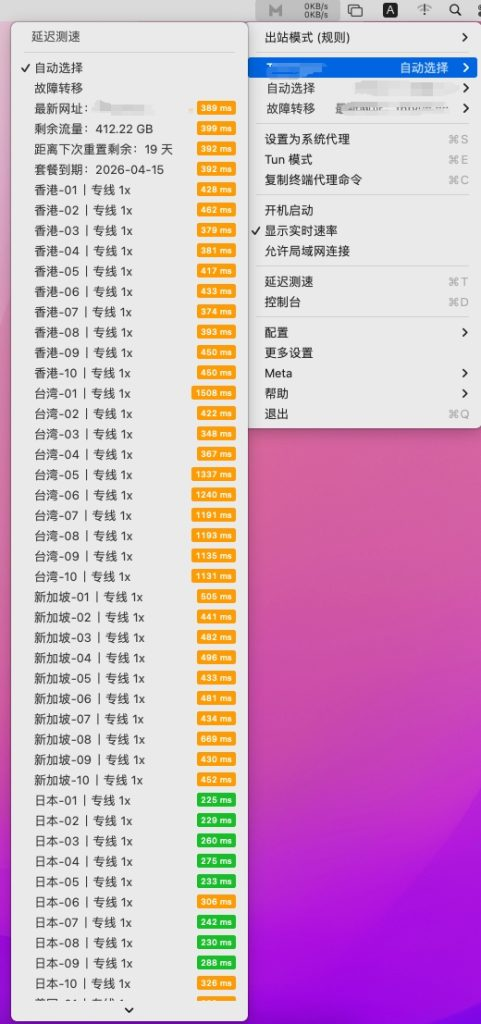
Select node
Open the proxy view to check node latency, then choose a node based on latency or your needs.
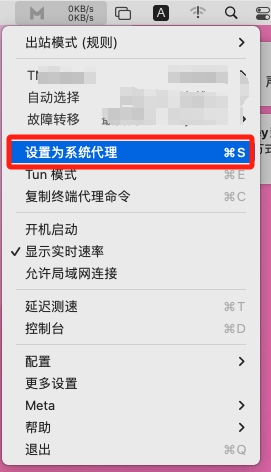
Enable system proxy
Click the ClashX Meta icon in the upper-right menu bar and choose Set as System Proxy. Traffic will be routed through the active profile.
Outbound mode notes
The reference keeps outbound mode notes at the end. Rule is usually preferred for rule-based routing; Global is for all-traffic proxy use; Direct temporarily bypasses proxy.
- Rule: route by profile rules.
- Global: route all requests through proxy.
- Direct: bypass proxy.